28 tháng 9, 2016

Dây thun Se


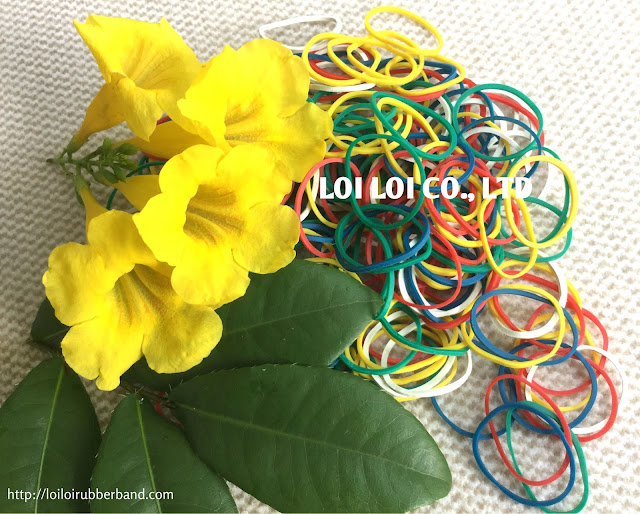
Dây thun se Lợi Lợi được sản xuất và đóng gói tại nhà máy dây thun Lợi Lợi.
Dây thun se được làm từ chất liệu cao su tốt với 100% cao su SVR 3L... và nhận sản xuất theo yêu cầu của từng khách hàng. Dây thun se Lợi Lợi được sản xuất cung cấp khắp toàn quốc sử dụng trong công việc giao thương buôn bán nhỏ lẻ.

Dây thun se Lợi Lợi kích cỡ là 27mm với màu Vàng truyền thống 
Cam kết cung cấp giá rẻ phân phối trực tiếp từ nhà máy dây thun lớn tại Việt Nam

Nhận làm dây thun với bất kì kích thước và màu sắc khác theo yêu cầu của Khách hàng

Giao hàng đến tất cả các tỉnh thành trên toàn quốc (miễn phí khu vực miền Bắc, miền Trung, Thành Phố Hồ Chí Minh) và xuất khẩu sang các nước trên toàn Thế Giới.
Liên hệ trực tiếp với chúng tôi để có giá cả hợp lý và hấp dẫn nhất. 

26 tháng 9, 2016

Công nghệ sản xuất dây thun


Công ty TNHH MTV Lợi Lợi chuyên sản xuất các loại dây thun khoanh, dây thun ống, dây thun cao su, dây chun vòng nịt, dây thun buộc hàng, dây thun quy cách và nhiều loại dây thun khác theo yêu cầu của khách hàng

Dây thun – dây chun hàng chợ thông dụng (lớn – trung – tiểu)
Dây thun buộc tiền (cung cấp chủ yếu cho ngân hàng và các công ty)
Dây thun cột báo (cung cấp cho các tòa soạn, văn phòng đại diện và các quầy, sạp nhỏ lẻ…)
Dây chun cột tóc với nhiều màu sắc, mẫu mã đa dạng
Dây thun dùng trong công nghiệp (dùng trong găng tay cao su, máy móc ...)
Dây thun dùng trong nông nghiệp (cột bông, cột rau, cột trái cây như thun đen vòng nhỏ cột ổi,…)
Dây thun dùng trong đóng gói bao bì, cột túi PE…
Dây thun dùng trong thực phẩm và thủy sản…
Dây thun Ruột xe dùng cho công nghệ thực phẩm nịt nem bì chả
Dây thun văn phòng phẩm, bưu điện…
Dây thun tiện dụng dùng trong các tiệm tạp hóa, các hộ gia đình…
Dây thun quy cách đặc biệt chất lượng xuất khẩu: đàn hồi tốt, chịu nhiệt cao

Nguồn hàng luôn luôn sẵn có phục vụ mọi nhu cầu của Quý Khách hàng
Giao hàng đến tất cả các tỉnh thành trên toàn quốc (miễn phí khu vực miền Bắc, miền Trung, Thành Phố Hồ Chí Minh) và xuất khẩu sang các nước trên toàn Thế Giới.
Liên hệ trực tiếp với chúng tôi để có giá cả hợp lý và hấp dẫn nhất. 

Mong được hợp tác với tất cả các Quý khách hàng gần xa.

15 tháng 9, 2016

How to Make a Frosted Vase with a Rubber Band


1. Select a smooth, glass vase without any grooves, raised designs, or embellishments. The best type of vase to use is one with straight sides. You can also use a clear wine bottle or a mason jar.

2. Wipe the vase down using a cotton ball and rubbing alcohol. This will get rid of any oils that might prevent the paint from sticking. If the vase is especially dirty, wash it using soap and warm water.

3. Wrap rubber bands around the vase. You can position them straight across, at various angles, or a combination of the two. Don't be afraid to overlap some of the rubber bands either! For a more interesting design, choose a variety of rubber bands, both thick and thin.

4. Take the vase into a well-ventilated area and place it upside down on a sheet of newspaper. The best place to work would be outdoors. If you can't work outdoors, make sure that you have plenty of windows open. Cover your work surface with newspaper, and make sure that there's nothing nearby that can get ruined.

5. Spray the entire vase using short, even strokes. Shake the can until you can hear it rattle, then hold it 6 to 8 inches (15.24 to 20.32 centimeters) away from the vase. Apply the sealer in quick, even strokes. It will take about 10 to 20 minutes for the paint to dry.
  • For the typical, frosted look, choose a paint that says "frosted glass" on it.
  • For a more interesting look, you can use a colored spray paint, such as gold or silver. You can even experiment with glittered spray paint.
6. Apply one or two more coats, if needed. Allow each coat to dry for 10 minutes before applying the next one. If you are working with "frosted glass" spray paint, don't worry if it looks clear at first; it will look frosted once it dries.

7. Allow the vase to dry overnight before removing the rubber bands. If a little paint got under the rubber bands, use your fingernail to scratch it off. If there is a lot of dust on the vase, wipe it down with a damp cloth.

8. Display the vase. You can use it to hold flowers or candles. You can even make it fancier by wrapping a pretty ribbon around the center.


12 tháng 9, 2016

Dây thun Hàng chợ & Thun quy cách


Chúng tôi chuyên cung cấp cho các doanh nghiệp, các công ty vừa và nhỏ trong nước với các loại sản phẩm đa dạng:
Dây thun hàng chợ thông dụng (Lớn, Trung, Tiểu), màu xanh lá – Vàng - Đỏ dùng nịt tiền, tạp hóa, văn phòng phẩm…
Dây thun xe dùng cho công nghệ thực phẩm nịt nem bì chả
Dây thun đen vòng nhỏ (dây thun cột ổi)

Dây thun quy cách đặc biệt chất lượng xuất khẩu: đàn hồi tốt, chịu nhiệt cao.

6 tháng 9, 2016

Bán dây thun kiếm triệu đô


Cheong-Choon Ng - cựu kỹ sư của Nissan Motor tại Mỹ đã nghĩ ra ý tưởng bán bộ thun sặc sỡ để đan vòng với giá 17 USD. Loại đồ chơi này được trẻ em Mỹ ưa thích với hàng triệu sản phẩm được tiêu thụ trong hơn hai năm qua.
Trẻ em trên khắp nước Mỹ đang phát sốt với trò chơi đan vòng từ những chiếc dây thun sặc sỡ, CNN cho biết. Mỗi bộ chun nhãn hiệu Rainbow Loom được bán với giá 17 USD, gồm 600 chiếc thun đủ màu và dụng cụ hỗ trợ đan lát. Những video dạy đan theo mẫu cũng lan truyền nhanh chóng trên Internet.
Michaels Stores, một chuỗi bán lẻ đồ thủ công lớn tại Mỹ đã nhập mặt hàng này từ đầu tháng 8. Và Rainbow Loom đang bán chạy gấp 10 lần sản phẩm ăn khách nhất trước đây của họ, Philo Pappas - Phó giám đốc Quản lý sản phẩm của hãng cho biết.
Bộ vòng thun sặc sỡ này là ý tưởng của Cheong-Choon Ng - cựu kỹ sư của Nissan Motor tại Detroit (Mỹ). Hàng triệu bộ Rainbow Loom đã được bán ra trên cả nước kể từ khi ra mắt.
Ảnh minh họa
Rainbow Loom có thể tạo ra những chiếc vòng tay sặc sỡ như thế này
Ba năm trước, Cheong-Choon Ng vô tình thấy hai con gái - Teresa (12 tuổi) và Michelle (9 tuổi) làm vòng tay từ những chiếc vòng thun cao su. Việc này đã khiến Ng nhớ lại hồi nhỏ ở Malaysia, khi ông thường làm dây nhảy từ vòng chun. Muốn gây ấn tượng với hai con, Ng đã lấy vài chiếc thun nhỏ và cố đan một chiếc vòng, nhưng loại thun này quá bé so với ngón tay của ông.
Vì thế, Ng vào gara và làm ra một loại khung đan đơn giản bằng gỗ với vài hàng đinh ghim. Sau đó, ông bắt đầu đan vòng. Ban đầu, Teresa và Michelle tỏ ra không mấy ấn tượng. Nhưng khi nhìn thấy tốc độ thao tác của bố, hai cô con gái đã thay đổi suy nghĩ.
Teresa đã nhìn ra được tiềm năng kinh doanh khi thấy bạn bè xung quanh mê mẩn các món đồ chơi bố mình làm ra. Vì thế, Ng quyết định rút 10.000 USD tiết kiệm cho hai con gái học đại học để làm vốn ban đầu.
Ng đã mất 6 tháng, qua 28 mẫu thiết kế để chọn ra một bộ sản phẩm ưng ý. Sau đó, ông tìm được một nhà cung cấp tại Trung Quốc và nhận được chuyến hàng đầu tiên vào tháng 6/2011. Đó là một thùng thun khổng lồ nặng tới hơn 900 kg.

Một bộ sản phẩm hoàn chỉnh được bán với giá 17 USD. Ảnh: Toyandco
Ban đầu, Rainbow Loom được tiêu thụ rất chậm. Ng đã phải đến các triển lãm thương mại và trại hè trẻ em để quảng cáo. Thậm chí, khi tới các cửa hàng, ông còn bị đuổi khéo.
Bước ngoặt xảy ra vào tháng 7/2012 khi một cửa hàng trong chuỗi The Learning Express Toys chấp nhận bán sản phẩm của ông. Cửa hàng này còn mở hẳn các lớp dạy đan vòng cho khách hàng.
“Có một lần, họ gọi điện cho chúng tôi và nói đã bán hết 24 sản phẩm trong một tuần, sau đó là 96 trong một tuần”. Cả Teresa và Michelle đều mang Rainbow Loom đến trường để quảng cáo cho các bạn học.

Trước lễ Giáng sinh năm đó, nhu cầu đột nhiên tăng vọt. “Rất nhiều đơn hàng được gửi đến và chúng tôi phải tìm sự giúp đỡ ở khắp mọi nơi”, Ng cho biết. Việc đóng gói một bộ sản phẩm hoàn chỉnh vẫn được cả gia đình Ng làm tại nhà.
Có thêm hàng triệu USD tài sản không hề khiến Ng tiêu xài hoang phí. Ông vẫn lái chiếc xe cũ 12 năm tuổi, còn người vợ vẫn thường tích trữ các phiếu giảm giá.

Toàn bộ lợi nhuận được họ tái đầu tư vào Rainbow Loom và suy nghĩ về mẫu sản phẩm mới. “Có thể chúng tôi sẽ làm bản đồ. Teresa đã chỉ cho tôi cách làm bản đồ Haiti rất thú vị”, Ng hào hứng.

1 tháng 9, 2016

Nghề sản xuất dây chun


Nghề sản xuất dây chun đã có ở Việt Nam từ hơn 20 năm qua. 
Sản phẩm không chỉ được người tiêu dùng trong nước ưa chuộng mà còn vươn ra cả thị trường nước ngoài. Nguyên liệu sản xuất chủ yếu là nguồn cao su dồi dào từ các đồn điền cao su dọc theo các vùng cao như Tây Nguyên. 

Với một sản phẩm nhỏ bé, tưởng chừng như không có giá trị thế nhưng đã mở ra hướng đi mới trong phát triển kinh tế và góp phần làm "thay da, đổi thịt" đời sống kinh tế của nhiều vùng cũng như nhiều hộ gia đình làm nghề và sống với nghề

30 tháng 8, 2016

17 mẹo vặt với dây chun cực tiện lợi không phải ai cũng biết


Chỉ với vài phút thực hiện cùng chút sáng tạo, những sợi dây chun sẽ biến thành công cụ hỗ trợ đắc lực trong công việc cũng như cuộc sống hằng ngày.


Trong nhà chúng ta luôn có những sợi dây chun ở khắp nơi, và thường xuyên phủ bụi cho đến lúc bị bỏ đi một cách "không thương tiếc". Vậy tại sao các bạn không tham khảo một vài mẹo vặt đầy hữu hiệu của dây chun dưới đây?

17 mẹo vặt với dây chun cực tiện lợi không phải ai cũng biết 11. Bạn là một người đọc sách rất nhanh? Hãy thử buộc một chiếc dây chun vào đầu ngón tay xem, việc lật trang sách sẽ đơn giản hơn nhiều đấy! 

17 mẹo vặt với dây chun cực tiện lợi không phải ai cũng biết 2
2. Những chiếc ly uống rượu vang luôn bị vỡ hoặc sứt mẻ khi cho vào máy rửa bát là nỗi phiền toái của nhiều bà nội trợ. Thật may, dây chun có thể giải quyết vấn đề này rất đơn giản.

17 mẹo vặt với dây chun cực tiện lợi không phải ai cũng biết 3

17 mẹo vặt với dây chun cực tiện lợi không phải ai cũng biết 4
3. Các bạn gái thường có xu hướng thích mẫu sơn đầu móng tay đơn giản. Tuy nhiên, không phải ai cũng đủ khéo léo cả và dây chun là giải pháp hoàn hảo cho công việc làm đẹp này.

17 mẹo vặt với dây chun cực tiện lợi không phải ai cũng biết 5
4. Khi mà móc quần áo quá trơn mà bạn lại treo những chiếc váy 2 dây rất dễ tuột? Hãy buộc dây chun vào cuối cái móc áo và bạn có thể quên vấn đề đó đi.

17 mẹo vặt với dây chun cực tiện lợi không phải ai cũng biết 6
5. Cái thớt của bạn luôn "nhảy nhót" mỗi khi bạn thái hay chặt gì đó? Buộc vào nó một chiếc dây chun để nó tự phải tự tiết chế "sự tăng động" của mình lại.

17 mẹo vặt với dây chun cực tiện lợi không phải ai cũng biết 7
6. Dây chun cũng là một công cụ tuyệt vời để giải quyết những giọt sơn bám lại trên chổi cọ thay vì gạt vào miệng hộp sơn, từ đó giúp bạn tiết kiệm sơn hơn nữa.

17 mẹo vặt với dây chun cực tiện lợi không phải ai cũng biết 8
7. Trót nấu một nồi to thức ăn mà lại chỉ có một mình? Hãy dùng dây chun buộc lại thật chắc chắn và bạn có thể thoải mái mang sang nhà ai đó thưởng thức mà không lo bị đổ.

17 mẹo vặt với dây chun cực tiện lợi không phải ai cũng biết 9
8. Dây chun cũng là một chất liệu "hay ho" để tạo ra một trào lưu handmade mới.

17 mẹo vặt với dây chun cực tiện lợi không phải ai cũng biết 10
9. Khi mà bạn đã chán phải nhìn bộ sạc laptop vì nó quá đơn điệu, hãy thử biến hóa nó một chút xem sao.

17 mẹo vặt với dây chun cực tiện lợi không phải ai cũng biết 11
10. Để lọ thủy tinh với nắp sắt vào trong tủ lạnh thường sẽ khiến bạn loay hoay một lúc để mở được nắp hộp. Mẹo nhỏ: Hãy buộc dây chun vào nắp và mọi thứ sẽ được giải quyết dễ dàng hơn nhiều.

17 mẹo vặt với dây chun cực tiện lợi không phải ai cũng biết 12
11. Cuối năm dọn dẹp nhà cửa với hai tay lỉnh kỉnh bao nhiêu là đồ mà lại cứ phải mở cửa đi ra đi vào, thật là phiền phức đúng không? Chỉ cần một chiếc dây chun, giờ bạn có thể gạt bỏ qua hết phiền toái với chiếc nắm đấm cửa.

17 mẹo vặt với dây chun cực tiện lợi không phải ai cũng biết 13
12. Buộc quần áo bằng dây chun sẽ gọn gàng hơn, rất tiện cho những chuyến đi xa dài ngày (như là du học chẳng hạn).

17 mẹo vặt với dây chun cực tiện lợi không phải ai cũng biết 14
13. Bạn hay uống trà nhúng và thường xuyên làm tuột dây tem vào trong cốc? Hãy cố định chúng lại theo cách thật đơn giản.

17 mẹo vặt với dây chun cực tiện lợi không phải ai cũng biết 15
14. Vì nhiều lý do, bụng bạn trở nên quá khổ và thậm chí còn chẳng dùng được thắt lưng? Dây chun sẽ là "phao cứu sinh" tạm thời cho bạn lúc này, nhưng hãy tìm đến một giải pháp hiệu quả hơn nhé!

17 mẹo vặt với dây chun cực tiện lợi không phải ai cũng biết 16
15. Bút thì trơn mà tay bạn thì mỏi. Hãy buộc chúng lại với nhau để nắm thật chặt, giữ thật lâu và làm việc hiệu quả hơn.

17 mẹo vặt với dây chun cực tiện lợi không phải ai cũng biết 17
16. Dây chun có thể giữ chắc những lát táo cắt sẵn không bị rớt ra ngoài hay bị thâm đen nếu bạn muốn đem chúng theo trong những chuyến du lịch.

17 mẹo vặt với dây chun cực tiện lợi không phải ai cũng biết 18

17. Bạn có quá nhiều chiếc cốc giống nhau trong một buổi tiệc tùng? Dây thun các màu sẽ thay bạn làm dấu những chiếc cốc trong bữa tiệc cho tất cả mọi người.

29 tháng 8, 2016


Sản phẩm dây thun được sản xuất từ 100% cao su tự nhiên, chất lượng đạt tiêu chuẩn xuất khẩu, giá cả rất cạnh tranh. 

Malaysia: Rubber Market Likely To Trend Higher next week


KUALA LUMPUR — The Malaysian rubber market is expected to trend higher next week on the back of stronger oil prices. A dealer said the higher oil prices would push up rubber prices as industry players would quickly switch to  from petroleum-based synthetic rubber. He said the uptrend would also be driven by expectations that , the world’s largest rubber producer, would discuss on the possibility of freezing rubber production in the near future.
It was reported that the Thai government planned to encourage rubber smallholders to chop down 350,000 rubber trees annually to stem a 60 per cent slide in natural rubber prices for the past three years. However, the dealer said the increase in local rubber prices might be capped by a stronger ringgit as this would make the commodity more expensive and less attractive to international traders. For the week just-ended, the local market was mostly mixed, driven by the stronger , but capped by firmer ringgit against the dollar. On a Friday-to-Friday basis, the ’s official physical price for tyre-grade SMR 20 lost 1.5 sen to 517.0 sen a kg, while latex-in-bulk gained 11.5 sen to 441.5 sen a kg. The 5 pm unofficial closing price for SMR 20 declined seven sen to 519.0 sen a kg, while latex-in-bulk appreciated 12 sen to 444.0 sen a kg.

19 tháng 8, 2016

Physical Properties of Rubber
Written by Dale T. McGrosky


In this article we will describe the physical properties of rubber that you will see on Physical Property Data Sheets for elastomers that are tested to ASTM D2000 specifications. I have described what the property is, why it is important, and how you test it. There are many more physical properties of rubber than what are described here, but, we will limit them to the most common physical properties you will see in the ASTM D2000 standard.

I have broken this article into 2 parts. First part will cover Hardness, Ultimate Tensile Strength, Elongation, Tensile Set, Young's Modulus and Yield Strength. The results of these properties, except Hardness and Tensile Set, are found on the stress-strain curve that is generated during a Ultimate Tensile Strength test. Part 2 will cover Tear Resistance, Compression Set, Ozone Resistance, Fluid Resistance, Low Temperature Resistance, Abrasion Resistance.

Forces


Figure 1 – Types of Forces

Lets take a quick look at some forces before we get started on explaining properties. These forces will be applied to the specimen during testing. Being familiar with these will also give you and understanding of the forces that may be applied to the rubber parts while in your application. 

Lets take a rectangular block of rubber as a specimen. If you squeeze the small sides together this is compressive force. If you stretch the block, this is tension or tensile force. If you twist the block this is torsional force and if you apply an opposing force to the side on top and opposite side on bottom, this is shear force. Some of these forces will be applied to the specimen during testing. 
Hardness
 
Hardness is the measure of how resistant solid material is when a force is applied. There are 3 main type of hardness measurements, scratch, indentation and rebound. We will only be talking about the indentation hardness for elastomers. Indentation hardness is the materials resistance to indentation by an indentor. 

Rubber is made in different hardness' for several reasons. Some sealing surfaces may not be totally smooth. The little voids, pits and scratches allow a pathway for fluid or air to escape through. Softer materials tend to flow better into these voids and imperfections on the sealing surface creating a better seal. On the other hand, harder rubbers will not do this as well but they do resist extrusion cause by high pressures. Also, coefficient of friction is also affected by the hardness of the rubber. Softer rubber has a higher coefficient of friction and harder rubber has a lower coefficient of friction. Coefficient of friction plays a factor when the rubber seal is sealing a part that moves. 
Measuring Hardness
 
The durometer gauge is used to test the hardness of elastomers. The 3 most common durometer gauges used to measure rubber are Type A, Type M and Type D. Type A is used to test soft rubber materials while Type D is used to test hard rubber and plastic materials. Type M, also for soft materials, was developed to test small specimens, typically O-rings, that do not meet the physical size requirements specified in ASTM D2240. Is is important to know that although each of the hardness scales are graduated from 1-100, these scales are not the same. 90 Shore A is not the same as 90 Shore D or 90 Shore M. A piece of rubber measuring 90 on a Shore A gauge will read around 42-43 on a Shore D gauge. 


Figure 2 – Stress-Strain curve showing Ultimate Tensile Strength, Ultimate Elongation and Modulus @ 100% Elongation

Tensile Strength
 
Ultimate tensile strength, or just tensile strength, is the maximum force a material can withstand without fracturing when stretched. It is the opposite of compressive strength. Have you ever purchased a pair of shoes and they came joined together with a piece of string? Instead of getting a pair of scissors, did you opted to test your physical strength against the tensile strength of the string and try to break it by pulling on it? If the string has a low tensile strength you should be able to pull and break the string easily. You can apply more tensional force than the string can withstand. If it has a high tensile strength it will be much harder to break by pulling. Are you starting to understand what tensile strength is? 

Tensile strength is an indication of how strong a compound is. Any time you have an application where you are pulling on the part, tensile strength is important to know. Whether your product is designed to break easily or not at all the tensile strength will let you know how the object will react to the tensional forces. A few rubber products that tensile strength are important would be bungee cords, rubber tie downs, drive belts. Some elastomeric compounds, like Silicone, have a low tensile strength making them unsuitable for a dynamic types of seal because they can fracture easily. 

Measuring Tensile Strength
 
Tensile strength is measured with a tensometer. A tensometer is special machine that is designed to apply a tensional or compressive force to a specimen, in our case a die cut dumbbell shape, and measure how much force it takes to deform and fracture the specimen. The force is typically displayed on a stress-strain curve that shows how much force was required to stretch the specimen to deformation and ultimately break. 

Elongation
 
Maximum elongation, with respect to tensile testing, is the measure of how much a specimen stretches before it breaks. Elongation is usually expressed as a percentage. I had an application where a very small O-ring with an inside diameter of .056 inches had to stretch over a rod with a diameter of .170 inches. A Nitrile O-ring worked fine since it's ultimate elongation was well over 400% and the O-ring was able to withstand the 200% stretch during installation. But when we tried to use a fluorocarbon compound several of the O-rings were breaking during installation. This fluorocarbon compound had an ultimate elongation of 150% and could not withstand being stretched to over 200% during the installation and the o-ring would break. 

Measuring Elongation
 
Elongation is measured with a ruler or an extensometer. An extensometer is an electronic ruler that is attached to the tensometer and will measure the extension of the specimen while torsional force is being applied. Another way of measuring elongation is with a regular ruler. To measure the elongation with a ruler, make two bench marks 1 inch a part on the specimen. This is the Initial Gage Length (Lo) and then measure the distance between the marks just before the specimen breaks. This is the Final Gage Length ( Lx). Calculate the elongation with the following equation: elongation % = 100( Lx – Lo ) / Lo. 

Tensile Set

While we are using bench marks, let quickly talk about Tensile Set. Tensile Set is the extension remaining after a specimen has been stretched and allowed to relax for a predefined period of time. Tensile Set is expressed as a percentage of the original length. Tensile set results are not found on the stress-strain curve. It's a measurement that can be performed after the tensile strength test. Do not mistake Tensile Set with Elasticity. Elasticity is the mechanical property of a material to return to its original shape where Tensile Set is the amount on extension remaining after being stretched. 

A rubber band would have a low Tensile Set percentage. After stretched it relaxes close to, if not exactly to, its original length. Now take a piece of Teflon and stretch it. It does not return to its original length and it stays in its stretched state. This would have a high Tensile Set percentage. 

One test we perform in our Q.C. inspection is to pull on the O-ring and see how fast and how close it returns to its original diameter. The O-ring should fairly quickly return close to its original diameter. Often times a seal has to be stretched during installation and the last thing you want to happen is the O-ring stay stretched and not fit which could cause problems during assembly.
 
Measuring Tensile Set
 
Remember the 2 bench marks 1 inch apart on the specimen in the elongation test? To determine Tensile Set after break, wait 10 minutes after the specimen breaks and then fit the two halves of the specimen back together so there is good contact along the full length of the break. Measure the distance between the bench marks. Use the same equation used in the elongation test except the Final Gage Length (Lx) is the final measured distance between the bench marks. Another way to test without breaking is to stretch the specimen to a specified elongation and hold for 10 minutes. Release the specimen as quickly as possible, making sure not to allow it to snap back, and let sit for 10 minutes. Measure the distance between the bench marks. Again, use the same equation used in the elongation test except the Final Gage Length (Lx) is the final measured distance between the bench marks.


Figure 3 - The steep slope would indicate this material is the tougher of the two material curves shown.Figure 4 - The shallow gentle slope shown on this curve would indicate this material is not very tough.

Young's Modulus

Young's Modulus is also known as Tensile Modulus, Elastic Modulus and Modulus of Elasticity (“Measure” of Elasticity). It's the measure of the stiffness of the material. You will see this on a physical property data sheet written something like “Modulus @ 100% Elongation.” 

When performing a Tensile Strength test a plot is made of the stress vs. strain or amount of force required to stretch (deform) the specimen given length. This plot is called a stress-strain curve. The peak of the curve is the Tensile Strength and the Young's Modulus is the slope of the stress-strain curve. If you have a steep curve the specimen resists deformation (it's tougher) and a if the slope is gentle the material will deform easily. At any given point on the stress-strain curve we can read the Tangent Modulus. “Modulus @ 100% Elongation” says we want to know the amount of force required to stretch (elongate) the specimen 100%. We can also ask for Modulus @ 200% or any given point on the stress-strain curve.

Knowing how easily a material deforms under strain can be important in some applications. An engineer was installing a rubber seal on a door. The rubber he used had high modulus. The door was hard to close because the rubber resisted being deformed. He then used a compound with low modulus that deformed easily allowing the door to close easily.
 
Measuring Young's Modulus

Young's Modulus is measured during a Tensile Strength test. As stated above, when performing a Tensile Strength test a stress-strain curve is plotted. The slope of this curve is the Young's Modulus and any point on that curve is a Tangent Modulus. 


Figure 5 – Young's Modulus (Linear Elastic Region) and Yield Point (Strength)

Yield Point
Yield Point is the force at which the specimen starts to deform permanently. It is difficult to point to the exact Yield Point on the curve because the transition is gradual, so a 2% offset (0.2% for metals) from the Linear Elastic Region is used to indicate the Offset Yield Strength. Although Yield Strength is meant to show the exact point where the specimen becomes permanently deformed, a 2% offset is an acceptable sacrifice because of how much easier it makes it to determine yield strength. 

Just prior to the Yield Point is the Linear Elastic Region. The slope of the line in this region is called Young's Modulus. This is the area which the specimen retains its elasticity. When the force is removed in this area the specimen will return to its original shape. After this area the specimen transitions from elastic to plastic behavior. This means that after the Yield Point, permanent deformation occurs in the specimen and it will no longer return to its original shape. Here is where I am going to throw a curve at you. In most elastomer stress-strain curves you will not see a definite yield point or plastic region. The elastomer specimen will remain in the linear elastic region throughout most of the curve as shown in the figures 3 and 4 except Urethane compounds shown in figure 5.
 
To summarize the above properties lets take a look at the stress-strain curve that is generated during the Tensile Strength test, see figures 2 and 5. 

Ultimate Tensile Strength – The amount of tensional force required to fracture a specimen. 

Ultimate Elongation – the amount a specimen deforms by stretching. 

Young's Modulus – The slope of the stress-strain curve that is generated during a tensile strength test. 

Tangent Modulus – Any point on the stress-strain curve. 

Yield Point – The force at which a material will begin to deform permanently.

These Properties are not seen on the stress-strain curve 
Hardness – The measure of how resistant solid material is when a force is applied. There are 3 main type of hardness measurements, scratch, indentation and rebound. 

Tensile Set – A measurement showing the extension remaining after a specimen has been stretched and allowed to relax for a predefined period of time. Tensile Set is not show on the stress-strain curve. Is is a measurement that can be done after a tensile strength test. 

So far we talked about properties where tension force was applied to the specimen. Some of these properties were tensile strength, elongation, modulus, and yield point. Now lets talk about compression set, compression-deflection and tear resistance, where compressive and sheer forces are applied, as well as weathering, ozone and low temperature resistance. Lets get started with compression set.

Compression Set
The purpose of the compression set test is to measure the ability of the rubber specimen to retain its elastic properties after compressive forces have been applied for a prolonged period of time at elevated temperatures. 

Compression set results can be useful to know when rubber seals, mounts or dampeners are subject to compressive forces in the application. This is particularly important when the seal is in a prolonged compressed state and even more so when simultaneously being exposed to elevated temperatures. When an O-ring is squeezed the rubber has elasticity. It wants to go back to its original shape. This elasticity is how the O-rings seals, especially under low or no pressure. When pressure is applied to the system the O-ring seal pushes against the groove wall opposite the direction of the pressure, forcing it to expand perpendicular to the direction it is being squeezed. This expansion provides additional sealing capability. 

When an O-ring is squeezed and subjected to excessive heat it can loose some or all of its elasticity and take a permanent set. Then, when you pull the o-ring out it no longer has a nice round cross section but instead has flat spots were it was squeezed in the application. This permanent set will reduce the sealing ability of the O-ring. The compression set test is a great way to see how the compound will react to compressive forces while subjected to heat. Also, poor compression set along with poor tensile strength can be an indication of the state of cure of the specimen. If you don't cure the compound enough these properties will diminish.

How to Test Compression Set
The specimen, usually a molded rubber disk, is squeezed between two metal plates to about 75% of its original thickness and then placed in an oven at elevated temperatures for a period of time. After the specimen comes out of the oven and is allowed to cool, measurements can be taken and the percentage of original deflection is calculated. 

The original deflection is the amount you compressed the specimen in the fixture. If you have a 1 inch thick specimen and compress it to 0.750” thickness, the original deflection is 0.250”. Now lets say the 1 inch thick sample measured 0.875” thick after the test. It took a 0.125” set. 0.125 is 50% of the original deflection of 0.250” or a compression set of 50%. The higher the percentage the poorer the results. 

You may see “Method A” or “Method B”. Method A is compression set under a constant force and Method B is compression set under constant deflection. Method B is the primary method used throughout the ASTM D2000 specification. 

Compression-Deflection
The purpose of the compression-deflection test is to compare the stiffness of the rubber materials under a compressive force. This test can tell you how much a part will deflect under a given load or, alternatively, how much load it will take to deflect a part a given distance. Rubber mounts and dampeners are some examples of parts that are subject to compressive forces and knowing the relationship between compressive forces and deflection can be important.

How to Test Compression-Deflection
Compression-Deflection is measured on a compression testing machine or can be measured on any other type of machine that can apply a measurable force to a specimen at a given rate and be able to measure the deflection to one thousandths of an inch. At Satori Seal our tensometer can apply compressive force at the specified rate and also measure the deflection. The test is performed by compressing the specimen to a specified compressive force and measuring the deflection results or compressing to a specified deflection and measuring the compression force results. 

Tear Resistance
The tearing of rubber is a mechanical rupture process started where forces are concentrated in an area usually caused by a cut, defect or deformation. 

How to Test Tear Resistance
Tear resistance is tested on a tensometer in the same manner as the tensile strength test except the specimen is one of 5 specific shapes: Type A, B, C, T or CP. A graph is produced in the same manner as the stress-strain curve except the Tear Strength graph is force over jaw separation length. Tear strength is calculated by taking the maximum force divided by the median thickness of the specimen (Ts = F/d).
Type A – Crescent shaped specimen with a nick or cut
Type B – Tab End specimen with a nick or cut
Type C – Right Angle specimen with a nick or cut
Type T (Trouser)– Molded block, 150 X 15 X 2mm, with a 40mm cut
Type CP (Constrained path)– Molded specimen 125 X 28.5 X 5.33mm. This is a special molded shape with fabric reinforcement molded in the mid-plane of the sample. The specimen has a narrows groove down the length in the center. 

Ozone Resistance
Ozone (O3), resistance is used to test the relative ability of the rubber compound to resist outdoor weathering or ozone chamber testing. Some applications like door and window trim would be subject to weathering so testing would give an estimation of how the rubber compound will react to weathering. Other sources of ozone exposure include air purifiers and ozone generators used to purify, deodorize, disinfect and kill bacteria in just about everything from air to food. 

How to Test Weathering/Ozone Resistance
ASTM Method D1171 addresses how to test weathering and ozone resistance. In D1171, rectangular cross section samples are wrapped around a wooden mandrel and left in the sun or placed in an ozone chamber. After a period of time either method A or method B is used to grade the samples. In method A no cracking is permitted under 2X magnification and in method B, three samples are checked and graded depending on the severity of cracking and given a quality retention value (expressed as a percentage) derived from Table 1 in ASTM D1171.

ASTM Method D1149 is used to test the effects of specific levels of ozone concentration on specimens that are under dynamic or static surface strain conditions. 


Low Temperature ResistanceThere are two low temperature tests that are used in testing low temperature properties of elastomers, ASTM D2137, Low Temperature Brittleness, and ASTM D1379, TR-10/TR-70 Temperature Retraction test. Low Temperature Brittleness is the most common low temperature test you will see on a physical properties data sheet. The temperature retraction test is not as common but will give you more accurate continuous operating low temperature results and a better indication of the viscoelastic and crystallization effects at low temperature.

ASTM D2137 - Low Temperature Brittleness 
The Low Temperature Brittleness test is use to determine the lowest temperature at which a rubber specimen will not exhibit fractures or cracks when subject to a specific impact condition. There are two tests methods, A and B. Test Method A is for rubber volcanizates and Test Method B is for rubber coated fabrics. This test is useful for development purposes but may not necessarily indicate the lowest temperature at which the compound will operate. The TR-10/TR-70 Temperature Retraction Test is more effective in determining the lowest temperature at which a compound will continue to operate.

How to Test Low Temperature Brittleness
Specimens are cut from a die and placed into a fixture. The specimens are immersed into a liquid bath at the specified test temperature for a determined length of time. After immersion deliver a single impact to the specimen and note any cracks, fissures or holes visible to the naked eye. Repeat the test at the next highest temperature (usually 10°C increments) until the specimen passes with no cracks, fissures or holes. 

ASTM D1379 - TR-10/TR-70 Temperature Retraction
The TR-10/TR-70 Temperature Retraction test is used to evaluate the crystallization effects and viscoelastic properties of the rubber specimen at low temperature. This test will give you a better indication of compounds lowest temperature at which it will continuously operate. 

How to Test TR-10/TR-70 Temperature Retraction
This test is performed by stretching a die cut specimen in a special fixture to 250% elongation or 50% of the ultimate elongation if 250% can not be obtained. The stretched specimens are immersed in in a liquid at -70°C for 10 minutes freezing the sample to a state of reduced elasticity. Now, after releasing the specimens, slowly raise the temperature of the samples and measure the temperature and length of the specimens at 2 minute intervals. Report the temperature at which the sample retracted 10% (TR10), 30% (TR30), 50% (TR50) and 70% (TR70). 

The TR10 value can be used to indicate the low temperature at which it will continuously operate, and it also correlates with the brittle point. The greater the temperature difference between the TR10 and TR70 the greater the tendency of the rubber to crystallize. TR70 also correlates with low-temperature compression set.

Understanding the physical properties of rubber will help you determine what properties are important to your application.